"It takes ages to finish a quilt you're not working on!"

Wednesday, February 29, 2012

Another tea cosy.

Inspired by my friend Helen's suggestion, I made my second tea cosy from my collection of ties.  I was going to make up a crazy patchwork block, and cut it into the shape I wanted, but ended up simply piecing strips of tie fabric side by side on a calico foundation.  I have some tutorials on how to make tea cosies in my collection of craft books, but I've studied them enough to know what to do, so I didn't actually consult any of the books when I made this yesterday.

 It only took a couple of hours, but the worst part was the hemming of the bottom edge; I had a choice of binding the edges or hand stitching the lining and outer cover with blind hemming.  I should have chosen the blind hemming!  As usual, I was in a hurry to finish it, and found a length of ribbon that was a close enough match to the fabrics.  Well, did I make a mess of that!   If you look closely you can see that I ended up doing two rows of zig zag machine stitch to hold it together, as the ribbon wasn't really wide enough, and the fabric edges kept slipping out.   And it pulled the sides in a bit too much.  Ah well, you live and learn.  I'll know better next time.  I've typed up a little tutorial for myself with easy instructions, because if I don't make another cosy for a while, I'll forget what I did!

Friday, February 24, 2012

Tea cosy photos.

There it is. Not your usual half moon shaped cosy, but Helen suggested making it the easy way, and so I did - just an oblong shape folded over, with ribbon on the sides to keep it in place. This was more of an experiment to see what I could do, and I took the opportunity of using up small squares of fabric from my scraps box. At the end of a patchwork project, I cut my scraps up into squares or strips so they are ready to use if I want to make a small scrappy item such as this. One side is made up from 2" squares and the other side from 4" squares. Helen had given me two pieces of upholstery sample fabric last week, and it was perfect for the lining. Some bits of leftover wadding filled it nicely, and buttons at strategic spots hold the layers together.  Next time I will use the same fabric(s) all over instead of different ones each side.  I'll also try to make the rounded shape cosy next time.  Would you buy this at a tea cosy sale?

Tea Cosy.

I whipped up a teacosy today.  I was visiting my friend Helen the other day, and telling her I was thinking of making a teacosy for the Teacosy Festival at Bundoora Homestead in May.  This is an annual fund raising event for the Cancer Council of Victoria, and they ask people to donate handmade teacosies which are displayed in the gallery for a couple of weeks.  Visitors to the gallery can purchase the teacosies, which are left on display until the end of the event, and collected afterwards by the buyers.
I had been showing Helen my ties CQ blocks, as she has a vested interest in anything I do with my ties, seeing she has spent many hours helping me de-construct them over cups of tea!  When we got to talking about the teacosy festival, and I said I might make a patchwork cosy, she suggested I make one using some of my ties.  Great idea!  But I didn't want to use the ties for my first effort in case I stuffed it up :-(
so I just used some of my scrap stash.  It has turned out very nicely, but I have some finishing touches to do before I take a photo and post it here.  Watch this space...there will be more teacosies appearing in due course!
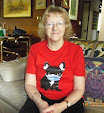
Helen and Gina, taken on Helen's 70th birthday last weekend.

Thursday, February 23, 2012

Crazy Quilt Journal Project, February block complete.

My quilt blocks for this project will all be made using ties, as I wrote earlier this year. I am making each block in a different colour range, and will try to incorporate a theme of some sort as well. When I created the purple block for January, I didn't have a theme in mind, as I just wanted to make a start on the block regardless. But I gave my second block the theme of Valentines Day, hence the bright red.
Next month being March, my block will be in shades of green, for St Patrick's Day! Anyone know where I can find an embroidered shamrock? Before I close this post, I want to show you what I bought on Amazon recently. It cost an arm and a leg; the pack of cards was only a couple of dollars, but the postage was a shocking $A17! I was spitting chips and put in a complaint to the seller, but all they kept saying was that Amazon set the shipping rates according to what the item is, not how big it is or how much it weighs. Fair enough, but it only cost me $12 to ship a book from the USA last month, which was at least four times the size of a deck of cards. Enough grumbling. Check these out - so cute!
A pack of playing cards featuring crazy quilt designs by Allie Aller. The box is at the top right of the photo, and the card next to it shows the front of all the cards.  Allie has a picture of herself for the Joker!  The CQ photos are only on the King, Queen, Jack and Ace of each suite, and each photo is a different design.

Sunday, February 19, 2012

Memory quilt wall hanging finished.

I finally put the wadding and backing on this wall hanging, and 'bagged' it to finish off rather than add a border, because I didn't want to put anything around the edge of the 'woodwork' fabric. I haven't quilted any of it yet; instead I've used vintage brooches and buttons in strategic places to hold the layers together. As it won't be on a bed or chair, nor thrown into a washing machine at any time in the near future, I'm not too concerned about the lack of quilting. I could hand quilt in the ditch around the black areas, but for now I'll leave it. Ken has already chosen a spot to hang it - in the lounge room, by taking down a tapestry that wasn't done by me. I'm just pleased that he likes it enough to hang it in the lounge, rather than be rolled up and stored with the rest of my projects, lol!

Friday, February 17, 2012

Surprise package from Pam, bits and bobs.

Pam K is one of the most talented CQ embroiderers in the world as far as I'm concerned, so I am always tickled pink when she sends me one of her creations! This is one of her three dimensional CQ cats. The second photo is a bit closer so you can see the detail. Pam embellishes to the NTH degree - fabulous work! Thanks again, my dear friend :-)

I found this cloth at the opshop today for $3, and even though it is machine embroidered, it is so beautifully done I decided it was worth adding to my collection.  You can't tell from the photos, but most of the thread is metallic, with a lot of gold thread used.
 

Check this out.  Tiger follows me all around the house when he is inside, and if I settle down in one room for a while, he has to settle down with me.  But please, Puss - not in my lace box for goodness sake! 

Monday, February 13, 2012

Mitred corners mastered!

Last month, I was having fun experimenting with small projects from books that I'd borrowed from our library. One was a small mat made from scraps. It has been sitting unfinished on my desk up until now - all I had to do was the binding. I usually take the easy way out when I bind my patchwork projects, by 'bagging' them, or sewing a strip top and bottom, then on each side. But as this was a small item, I decided to have a go at mitring the corners. I have been shown how to do this, I've watched tutorials online, and I've studied the technique in books and magazines, but it contined to defy me. But today I made up my mind, I was going to do it. I have a DVD put out by Patchwork & Quilting magazine, called "The Secrets to Perfecting Mitred Borders and Bindings".  I put it into my computer and started playing it.  Trotting back and forth between my sewing room and the computer room, I managed to achieve a nicely mitred binding on my mat - hooray! And it isn't so hard after all...just have to hold your tongue the right way, lol!
It is a bit hard to see, but you can see how neat it looks!
.....
Change of topic.  This embroidered cat came from Jan Elliott in Canada, who buys lots of goodies at estate sales and auctions, and onsells many of them on her Etsy site.  Her own passion is collecting scarves.  When I saw this pussycat on her Etsy site, I asked if she would like to swap it for some silk scarves I'd found in opshops here, and she was happy to do that.

Wednesday, February 08, 2012

The Button Shop in Malvern.

A few years ago, I was searching for darning wool to mend Ken's socks. I finally found some in a haberdashery shop in Glenferrie Road, Malvern, but I didn't take a note of the address. I've looked for this shop a few times since then, but obviously didn't walk far enough, because I found it again the other day, and the saleslady said they've never moved from where they are now! I asked her if I could take some photos to post on my blog, because I know the readers based in Melbourne would love to know more about the shop once they knew what goodies were in stock, and she was happy for me to do so. Apart from L'ucellos and the Button shop in the Nicholas Building in the CBD, this is by far the best haberdashery shop I know of in Melbourne.  Just take a look at these photos and see if you can compare it with anywhere else! Leaves Spotlight and Lincraft for dead!
The Button Shop, 181 Glenferrie Road, Malvern.
All those red draws along this wall hold buttons!
They also sell wool and related knitting and crochet products.
Ribbons, ric rac, braid, etc.
Laces!!!
And needles of course, as well as anything else you want in the haby. line.  I could get happily lost in this place for weeks!!

Sunday, February 05, 2012

CQJP 2012 update.

I added some more lace and beads to my purple block, and have decided enough is enough for that one.
My February block is a red one (Valentines Day inspired) and I put the fabrics together last night. I'm looking forward to playing with this as I have lots of ideas for embellishment. Last year when I signed up for this challenge, I wondered if I'd be able to keep up. The way I'm feeling now, I think I will be well ahead all year! I just love fondling my beautiful silk ties, and matching up the fabrics for my blocks. It doesn't take long to do the basic block, and if that is done early in the month, I have three weeks to play with it. That still leaves time to work on other projects sitting in the wings.

Thursday, February 02, 2012

A website to show off your UFOs!

While I was at the Guild today, I was browsing through the latest magazines in the library, and came across an article about two ladies who have started a collection of UFOs as part of a university project. It struck a chord immediately, and I copied down the website address so I could check it out later. They don't call the collection UFOs - instead, they refer to "Unfinishables". Hmmm.. whatever. They are asking people around the world to either post their UFOs to them in the UK, or email a photo along with a completed questionnaire that is provided. OK, my crafty bloggy friends - dig out your oldest UFO and email a pic to this site The Unfinishable!

Tuesday, January 31, 2012

Update on January block

I was jumping the gun as usual when I posted a pic of my unfinished block last night.  But I've been working on it today and am very happy with how it's looking.  One of the advantages of CQ for me is that I don't get bored with it.  I can work on other kinds of embroidery for a while, and may get bored with it because I know how it is going to look at the end.  Or sometimes I just tire of working on the same thing for weeks/months on end.  But with CQ it is an ongoing surprise - it evolves right before your eyes!  For instance, when I took that photo last night, I'd pulled out from my stash a few beads, sequins and buttons, but today when I knuckled down to the task, I remembered lace, braid, and ric rac, and within half an hour my work table was covered with everything in purple to choose from for embellishing the block!
 So here is where I am up to.  This picture shows the true colours, as I used the scanner instead of the camera.  The block overlaps the sides of the scanner by an inch each side, so the photo is a bit narrow, but you're not missing anything.
Unless I get any more light bulb ideas, tomorrow I will finish the extra feather stitching in dark purple, sew some buttons near the pink ric rac, and add beads or something else to the wide pale pink lace band.

First block for the CQJP 2012.

When I signed up for this challenge, I decided to use my collection of ties as the basis for the blocks. I will select a new colour range for each month out of the ties, and embellish them with whatever I have in my stash. Because the ties themselves are such beautiful fabrics and colours, I won't be over-doing the embellishing, as I don't want to cover up the fabrics too much. The seams will be covered by various embroidered stitches in the usual way, then I will add beads, sequins, and buttons where I think they will fit in. I may use plain (non patterned) fabric for the centre of each block, and sew something on it to make a statement for the whole block, such as an unusual brooch, ear ring, or anything else that matches the colour scheme. So here is my January block. The seams have been done, and I've picked out beads, sequins and buttons from my stash to sew on in the next few days.
Unfortunately, my camera does not like purple for some reason, and rarely gives a true impression of any shades of purple that I photograph. So you will have to take my word for it that these colours are actually vibrant shades of purples and mauves.

Monday, January 23, 2012

Have I got many tablecloths?

Yep. Quite a few....hundred.. I took this pile (32 cloths) of some of my favourites to the Boronia Probus Club last week, to give a talk about them to about 40 ladies (mostly 60 plus age group). They just loved my cloths, and enjoyed my enthusiastic talk about why I collect them, and why they should care for their own family linens.

This is the cupboard before I'd put that pile back in there. It was hard to find space, even though there were no more put back in than came out the week before!
Remember those leaves I messed up last week? I found a way to use them - here are two, appliqued on to an old cotton tote bag, which I was going to throw out, but I'll probably use it now!

Monday, January 16, 2012

Annie, this is for you!

Thank you to everyone who has left compliments on here regarding my Rainbow kittens and Memories wall hanging.  Annie wanted to know the story behind the picture of Ken and I, done up to look like it was taken 100 years ago.  It was taken 33 years ago actually, just before we got married.  We were visiting the Sovereign Hill outdoor museum in Ballarat (you have heaps of these museums in the USA!), and decided to have our photo taken by their photographer, who has a range of costumes that you can try on for your photo.  It came out so well we kidded people that it was our wedding photo!  I thought it was a good one to include on my memory quilt because it fits in with the era of the other genuinely old photos.

Messing around and messed up!

At Skill Builder Samplers, Leila has moved on to teaching how to do curves when patchworking. When I was learning Patchwork from a local tutor, I managed to complete a Drunkards Path block. With Jude's help, it was successful, but I haven't made anything with curves since then (apart from applique). But I figured it is like riding a bike - once you've done it, you don't forget. HA! Right. So why did my sample of curves using Leila's tutorial turn out like this??
EEEEK!! I was so careful tracing and cutting those templates. I don't think I'll do curves any more... Maybe I was just having a bad night. These leaves are the second project from my library book, and I stuffed them up too. I traced the templates and cut out the leaf shape, but that wasn't right. It was supposed to be done another way, which would ensure the fabric prints all lined up the same way instead of in different directions like mine!  The two on the right hand side are the correct alignment, which was just a fluke considering what I'd done.  But once I re-read the instructions, I realised, so next time I do them (I think they would look great using Japanese print fabric), it will look much better.  Still, these leaves are rather nice, don't you think?  Especially on the black background.

I found this at Savers in Mill Park today along with a lot of other non-linen goodies.  This little cloth is done in cross stitch.  I love lady bugs!

Saturday, January 14, 2012

Messing around...

There are many other things I could/should be working on, such as finishing the Memories mini quilt, finishing some more UFOs, and making the next two blocks in Leila's Skill Builder Samplers class, but...I borrowed a stack of books from the Eltham Library a few weeks ago, and they are all due back next week. I've already renewed some of them twice, and I can't do it again so I had a close look at them to see if there was any projects I want to do before returning the books. One of the books is this one "Whip Up Mini Quilts" which I was tempted to order from Amazon, but I decided there are only three projects I REALLY wanted to do, and it wouldn't be worth buying the book for myself,  so I'm doing them this weekend.
The first one I've done (just has to have backing and binding to finish it off) is this neat little mat.  It is so easy, just cutting oblong pieces and fitting them together to make a 'frame' for a picture of some sort.
 
In the book they have used a photograph printed on cotton, but I fussy-cut a teacup from some patchwork fabric for mine, and added some lace. I might make some more of these for friends if they ask - using their photos. Make a nice gift!

Friday, January 06, 2012

Memories quilted wall hanging.

I've been flat out like a lizard drinking on this one. I wanted to finish it for our wedding anniversary (today) as a surprise for Ken, but I was still working on it tonight, and haven't done the backing and hand quilting. But the most part, it is finished, and I was able to show Ken just as our anniversary was drawing to a close. This pic is a bit washed out, as I laid the quilt on the floor to photograph it, and between fluro. light and the flash, it looks a bit insipid. Anyway, I'm pleased with the final result, as I've been wanting to make one ever since I cut the pattern out of a magazine a few years ago.  It took ages to find the fabric printed with the woodgrain, but I finally found some on good old eBay. 
The photos are of Ken and me on the top row, his great aunt Emily, and my Mum and her mother on the second row, and my great-grandmother on the third row.
The beautiful lace around the picture on the top row, and at the foot of the third row, are from one of my generous bloggy friends in the USA.   The rest are damaged doilies that I've cut up, and patchwork fabric scraps.

Wednesday, January 04, 2012

Another Skill Builder block completed.

This is the last applique technique Leila discussed on her Skill Builder blog. I've always admired the Baltimore-style quilts, but have no ambition to make one, so it was satisfying to make just one simple block along those lines.
I am now working on another memory mini quilt - for me, not a gift for anyone this time. I've had this in the WIP basket for the past year, and after the success of the table mat I did for SIL, it has spurred me on to get going with the original project.

Monday, January 02, 2012

Rainbow Kittens wall hanging finished.

Anyone would think I was trying to set some kind of record - two projects finished in two days! No, it is just coincidence. I had done a lot of work on both of these before New Year's Day, and as it has been so hot here in the first two days of the year, it is much more comfortable to stay inside with the air conditioners going, and concentrate on some stitching.

Sunday, January 01, 2012

Skill Builder sampler block, needleturn applique.

My first finish for the New Year is this block for the Skill Builder sampler. Leila posted links on her blog to a number of You Tube videos, demonstrating different techniques for applique, other than fusing fabric pieces on to a background fabric, then stitching around the edges. It was interesting to have a go at them all, but I think I'll stick to fusible webbing! I couldn't find the required freezer paper in any supermarket around here, but finally got a piece at Darn Cheap Fabrics in Heidelberg. The salesgirl told me they imported a roll of it from the USA and sell it here by the metre. I paid $1.10 for a metre. If I ever need a lot of it, I'll ask one of my kind bloggy friends in the USA if they would like to swap a roll of their freezer paper for a box of Tim Tams! Any takers??